Article Contents
Introduction
In today’s fast-paced digital age, photo booths have evolved from simple, instant photo printing machines to immersive experiences that innovatively capture and preserve memories. One such advancement is the introduction of lenticular photo printing software, which adds depth and dimension to traditional photographs. This article aims to raise awareness about the possibilities offered by 3D printing in photo booths, provide learning resources for mastering this technology, and discuss multicamera 3D options.
Lenticular Image Printing Software Ins and outs
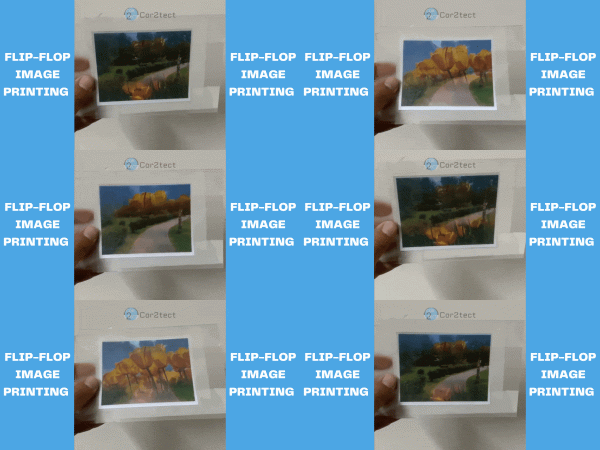
Lenticular image software allows photo booth operators and users to transform flat images into captivating 3D prints. By utilizing special lenses or materials, these prints create an illusion of depth and movement when viewed from different angles. This technology offers an exciting and interactive element, enhancing the overall photo booth experience and making it more memorable for event attendees.
What do you need?
- Lenticular photo booth software
- Lenticular Sheet
- Photo Printer and Photo Paper
- Laminating Machine or Adhesive Lenticular Sheet
Lenticular Printing Software: This software will help you to arrange the images for printing. Setting images manually may be a ton of work, but software can do it with a few clicks specially designed for live events.
Lenticular Sheet: This sheet is the most essential part of the process. This sheet is based on the LPI (Line Per Inch), where Higher LPI will give you a smooth experience. COR2TECT’s software supports up to 100 LPI. There are various types of laminating sheets. Choosing the perfect sheet as per your requirement to get an ideal result.
Photo Printer and Photo Paper: You need a printer to print your images. It depends on the quality of the printer. If you use a high-quality printer, the colors will appear much better and more vibrant.
Then, you need photo paper to print the output. It can be any quality photo paper. Good quality photo paper will give excellent output.
Laminating Machine: It is necessary to use a laminating machine to provide a polished finish to the output image. This machine will give a perfect look to the Lenticular Images.
A laminating machine is unnecessary if you can use some adhesive lenticular sheet. Attaching an adhesive lenticular sheet to a printed image is simple and straightforward.

How to use Lenticular Printing Software?
To print lenticular images, the software is a must. COR2TECT’s Lenticular Photo Generation software is an easy solution with a User-friendly UI and Easy to use. After launching the software, you’ll see the below setting to set parameters.
- Print Settings
- LPI
- Direction
- Resolution
- Add Image
- Preview
- Pitch Test
Now you need to know what those are, how and where to use them. Check the short brief about these settings below:
Print Settings: 3 parameters must be configured initially in the print settings.
-
- LPI: Set the field value to 50 when you’re using a 50 LPI Lenticular sheet.
- Direction: When referring to lenticular printing, the direction relates to how the image will be printed and how the sheet will be inserted. If the sheet is inserted vertically and the focus is also vertical, the resulting lenticular image will move up and down with the sheet.
- Resolution: By default, the answer is set to 300; It is changeable. If your printer’s max resolution is 600, set the value to 600.
Add Image: Images can be added manually, and manually added images will be shown on the right side.
Preview: You’ll see a preview of your selected images in this section.
Print: This will start the printing process. But before starting the printing process, a Pitch Test is necessary.
Pitch Test: This pitch test adjusts the settings perfectly per the sheet. It is essential to pitch test before going to the final print.
Tips: The lenticular sheet must be placed on the printed photo properly so that the lines align with each other perfectly. Otherwise, you’ll see some diagonal spots in the transition between 2 images.
Identifying the best Printer and Lenticular Sheet for your Live Events
There are several questions regarding the Printer and Lenticular. The printer and the lenticular sheet must be appropriately matched to get the best output. In general, a 3R size photo is recommended for live events because if the size of the photo is small, then you need to take it near your eyes to watch perfectly. On the other hand, if the image size is large, you need to move the idea far from your eyes to see the output correctly.
For 3R (10cm width, 8cm height), the recommended LPI is 50, and for 4R size recommended LPI is 40. Please check the table below for reference:
| Size | Recommended LPI |
|---|---|
| 3R | 50 |
| 4R | 40 |
Now let’s talk about the printer. It is another essential thing in the lenticular printing sense. You can use any type of printer as long as that printer can print match to your lenticular sheet. In general, no printer will face any issue printing the 3R size except DNP. From our experience, we recommend using DNP for 4R-size images.
How to do live events with the Lenticular Printing Software?
Using software for post-production is regular. You can take the footage now and edit it later when you get time. The challenging part is to make it happen in the live events. With COR2TECT, it is not impossible. Our software is fully automatic with 3D Multicamera. Whether you want to take 2D or 3D output, a multicamera setup can do it for you with the help of our software. When your cameras are triggered, the result of each camera will be sent to our software, which will process and print the output. For that, you must set the parameters before. You can make Lenticular prints from GIFs.
Learning and Training Resources for Lenticular Photo Booth Software
To harness the potential of lenticular 3D and 2D photo printing software, it is essential to have a solid understanding of the technology and the software tools available. Rest assured, abundant learning resources are accessible to assist you in commencing your venture. Online tutorials, video courses, and documentation provided by COR2TECT can guide you through creating stunning 3D and 2D prints. Our software is fully automatic with Multi Camera Setup.
Exploring MultiCamera 3D and Holographic 3D
While lenticular 3D printing is famous for adding depth to photographs, other techniques are worth exploring. 3D Photobooth Software involves using multiple synchronized cameras to simultaneously capture a subject from different angles. This approach provides a more comprehensive 3D representation, producing more realistic prints. On the other hand, holographic 3D printing employs advanced techniques to create three-dimensional holograms that appear to float in mid-air, captivating viewers with their futuristic appeal. Understanding the differences between these techniques can help you choose the right approach for your specific needs.
Contact Us Now to learn more about lenticular photo printing software.

hallo perkenalkan saya ade dari kediri, saya ingin bertanya apakah cor2tect ini dari indonesia?apakah saya bisa mengetahui berapa harga software2nya
hello cor2tect team, what LPI value is good for DNP printer? Currently we are trying many ways but our lenticular output is not good like yours. do you have any suggestions how to achieve it? Also how to get your software?