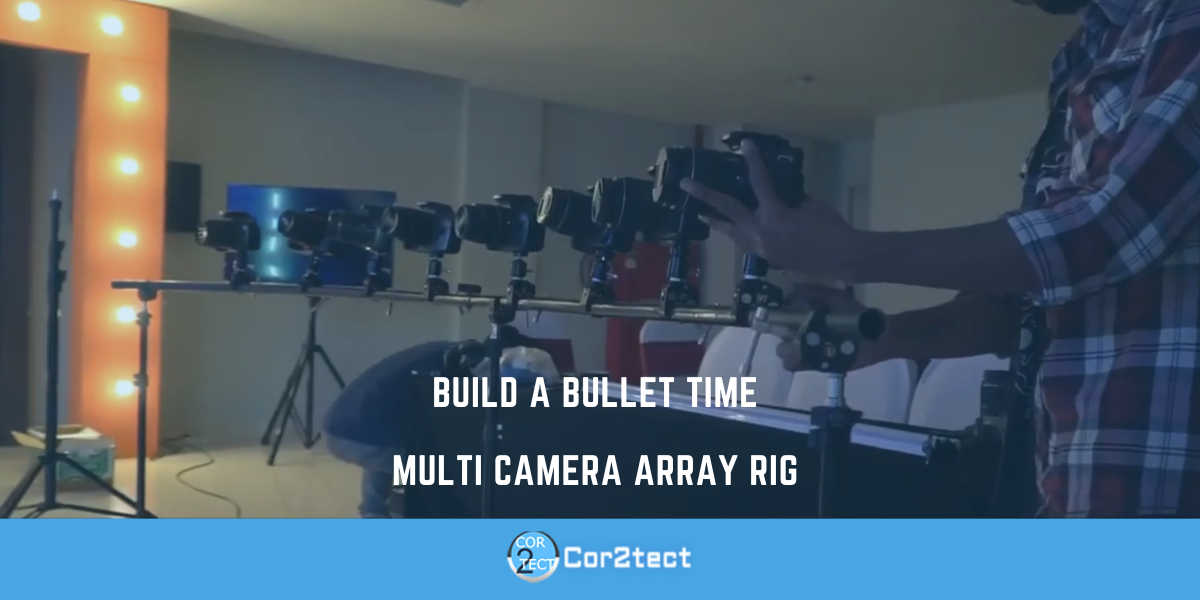
Bullet time is becoming more and more popular these days especially when we are talking about experiential marketing. The use of bullet time in live events is not very uncommon these days as the stunning 3D effect is very much popular in countries like Indonesia, Malaysia, Singapore, Russia. Many experiential marketers and event organizers are shying away from this spectacular effect due to a high level of invest but there is also another reason behind it. The multi-camera bullet-time array rig is another reason why some people duck out on bullet-time booth.
If you look at event rentals today you will quickly notice that bullet-time always gets the number of spots when we are talking about renting prices. But if you are doing a single camera it’s highly unlikely that you will earn a ton of money from it and your business is losing not only financially but also in terms of getting exposure. As I mention bullet time effect is quite popular among experiential marketers so big brands always use this to promote and launch their products in the market.
If you are struggling to create that awesome bullet time multi camera array rig then you came to the right place. In this article, I will show you how you can build a bullet time multi camera array rig from scratch.
Article Contents
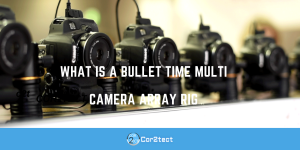
What is a bullet time multi camera array rig
Let’s start with the basics first and discuss what actually is a multi camera array rig? I will not go into the technical terms and try to keep it as simple as possible. The multi camera rig is a series of cameras that are placed side by side either in a straight, curved or circular manner. Depending on what type of effect you want you to need to build the rig. The most popular effects are 90 degrees, 180 degrees, and 360 degrees. The number of cameras will depend on the type of bullet time effect. We will explain one by one so just bear with me.
The cameras will not gonna stay on a pattern by itself. You need to give your cameras solid support as those are lined in one by one. It will be essential to give your cameras a solid structure as you don’t want the cameras to shake and capture a specific angle once you trigger those one by one. So the bullet-time camera array rig is the physical structure that holds and creates an angle for multiple cameras to create a 3D image of a subject from 90, 180 or 360-degree angle.
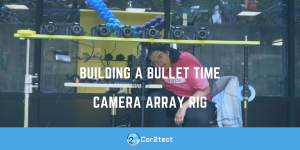
Building a bullet time camera array rig
Now it’s the fun and challenging part where you will build a bullet time camera array rig from scratch. As I mentioned there are three types of bullet time effect and each requires a different type of rig. We will jump onto that part later but first, let’s see what are the options for building the rig. We have two actually:
- Readymade method.
- DIY method.
Both the methods have their own pros and cons which we will dig deeper into and come up with a few solutions. I will also provide you with a few recommendations which help you to get started with building the rig.
- Readymade method:
As the name suggests this kind of camera array is readymade and you can start using it once you get your hands on it. The array is fixed but you will get a chance to specify the number of cameras when you wish to buy it.
- Quick implementation.
- Basic built-in software.
- Saves time and energy.
- Quick setup during live events
Disadvantages:
- Lacks scalability.
- Basic software can not produce professional output.
- Shipping costs can be a nightmare.
- The whole case can be pretty heavy so it’s hard to move around.
- Fixed angle so you can’t turn 90 degrees into 180 or 360 just by adding more cameras.
- Lacks customizability.
As you can see the disadvantages overturns the advantages so it’s better not to go for a readymade method. So the best option is the DIY method.
- DIY method:
The best outcome is achieved when you do something by yourself whether its a cup of coffee or bullet time rig. You get a mental satisfaction as only you know what you want so you have the freedom to make that wish into reality. When it comes to building materials you can use wood, aluminum, steel anything you wish. Just make sure you have something solid which can hold the cameras together. You don’t need any fancy cases around the cameras which will make the rig heavier. Like readymade rig the DIY rig also has few pros and cons.
Advantages:
- You can add as many cameras as you want.
- Can be used with any software
- Less costly than readymade rig
- DIY rigs are usually lightweight
- You can turn your 90 degree rig into 180 or 360
- Highly customizable
Disadvantages:
- It takes a lot of time and patience to build the perfect rig.
- Setup takes a lot of time.
- It can be very messy sometimes with wires all over the place.
Now you know both the methods and it’s time for you to decide which one is the best. If you wish to with the DIY method you need to decide which type of bullet time effect you wish to do.
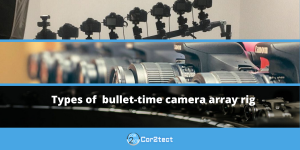
Types of bullet time camera array rig
Here is the tricky yet interesting part of the bullet time camera array rig. The type of bullet-time camera array rig is subject to your number of cameras and imagination. But working in his industry I have seen people building mainly three types of rig. Which are:
- The straight rig
- The curved rig
- The circular rig
The types are not the universal ones as you can create any kind of rig according to your specifications and we will just follow the basic approach to this section. So let us start:
- Straight rig: As the name suggests this type of rig is created horizontally in a straight line. The cameras are placed in a straight line one by one. The size of the rig will vary depending on the area you want to cover. If you have fewer cameras like 6-8 then the straight rig will be your best bet.
- Curved rig: When you are planning to 90 degrees and 180 degrees bullet time effect you need to curved rig. I hope you know how to measure the angle and if you don’t just look at a round watch. If you look at the 12 to 3 the shape you get is exactly 90 degrees and 12 to 6 will give you 180 degrees angle. When building the rig you need to make sure you have the same angle. Now for the camera, you can create 90 degrees with 10 cameras and 180 degrees using 15 to 18 cameras. Take the size of the rig and divide it with the number of cameras. The number you get is the space between each camera.
- Circular rig: This kind of rig is used for the 360 bullet time effect. The rig is round in shape and takes 20 to 32 cameras. Place the cameras in the round-shaped rig. You can place the rig on the ground and create hypnotic 360 effects. Take the diameter of the rig and divide it with the number of cameras you have. The number will tell you the gap between each camera. Just place the cameras one by and starts shooting.
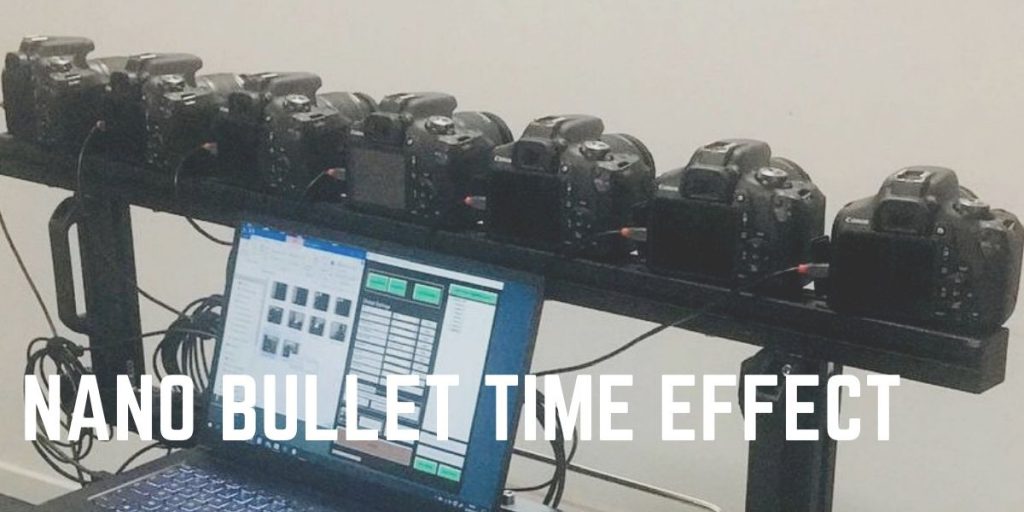 For Events During COVID-19
COVID-19 has turned the event industry upside down & the bullet time event industry was no exception. Due to increased social distancing among general mass setting up big bullet time rigs has decreased dramatically and people are shifting towards smaller rigs. Cor2tect has released a new software for Bullet Time which is called Nano Bullet Time Effect which is considered to be the best Multi Camera Rig for events during COVID-19. Using this you can trigger 6 cameras and use Diphideo Sharing Station which supports multiple sharing devices for free. Currently, this Nano Bullet Time Effect is on sale so contact us to book your package today.
Few Quick Hardware Tips for Building Bullet Time Rig
Now I hope you have decided which type of rig you want to build if you wish to proceed with the DIY method. Now you need to manage a few time camera ball head, ball head clamp, etc. I will also try to provide a few links from which you can easily buy the stuff. In case you need anything which is not mentioned you can always contact us. For building the camera rig, you need the following things:
1. Camera ball head: The camera ball head is just a plastic or metal apparatus that is usually positioned on the upper or top side of the tripod. This camera ball head enhanced the balance and gives quick and more firm and precise rotation of the camera for the photographers. This type of camera ball head is lighter than normal three-way pan-tilt tripod heads. You always order these camera ball head from Amazon. This is an absolute must as you need this camera ball head to attach the cameras with the aluminum steel or wood by which you plan to give your rig structure.
2. Camera ball head clamp:
The camera ball head clamp is optional if you do not wish to experiment with your rig too much. If you want to give your rig different angel you can buy head clamp from Amazon as well.
3. Rig Structure:
The aluminum steel rod or any other curve or straight metal or wood rod you can use for it based on your 90 degrees or 180 degrees or 360 camera array rig
4. Camera Connection:
You need Orico or Anker or Icybox 10+ port powered USB hub for cameras connection and you can wrap your USB cables and other wires for connection. It’s totally up top you how you wish to use your Cabelas.
Cor2tect just launched a super slow motion effect for Bullet Time and it is blowing people’s mind and you can also get your hands on the latest version of Cor2tect’s 3D Bullet Timeslice Booth.
There are no hard and fast rules when you are building the camera array rig. Unless you are going for the readymade rig, you can do all kinds of experiments with DIY bullet time multi camera array rig. If you need any help or if you have any issues don’t hesitate to get in touch with us.